Antiquing your old Cabinets!
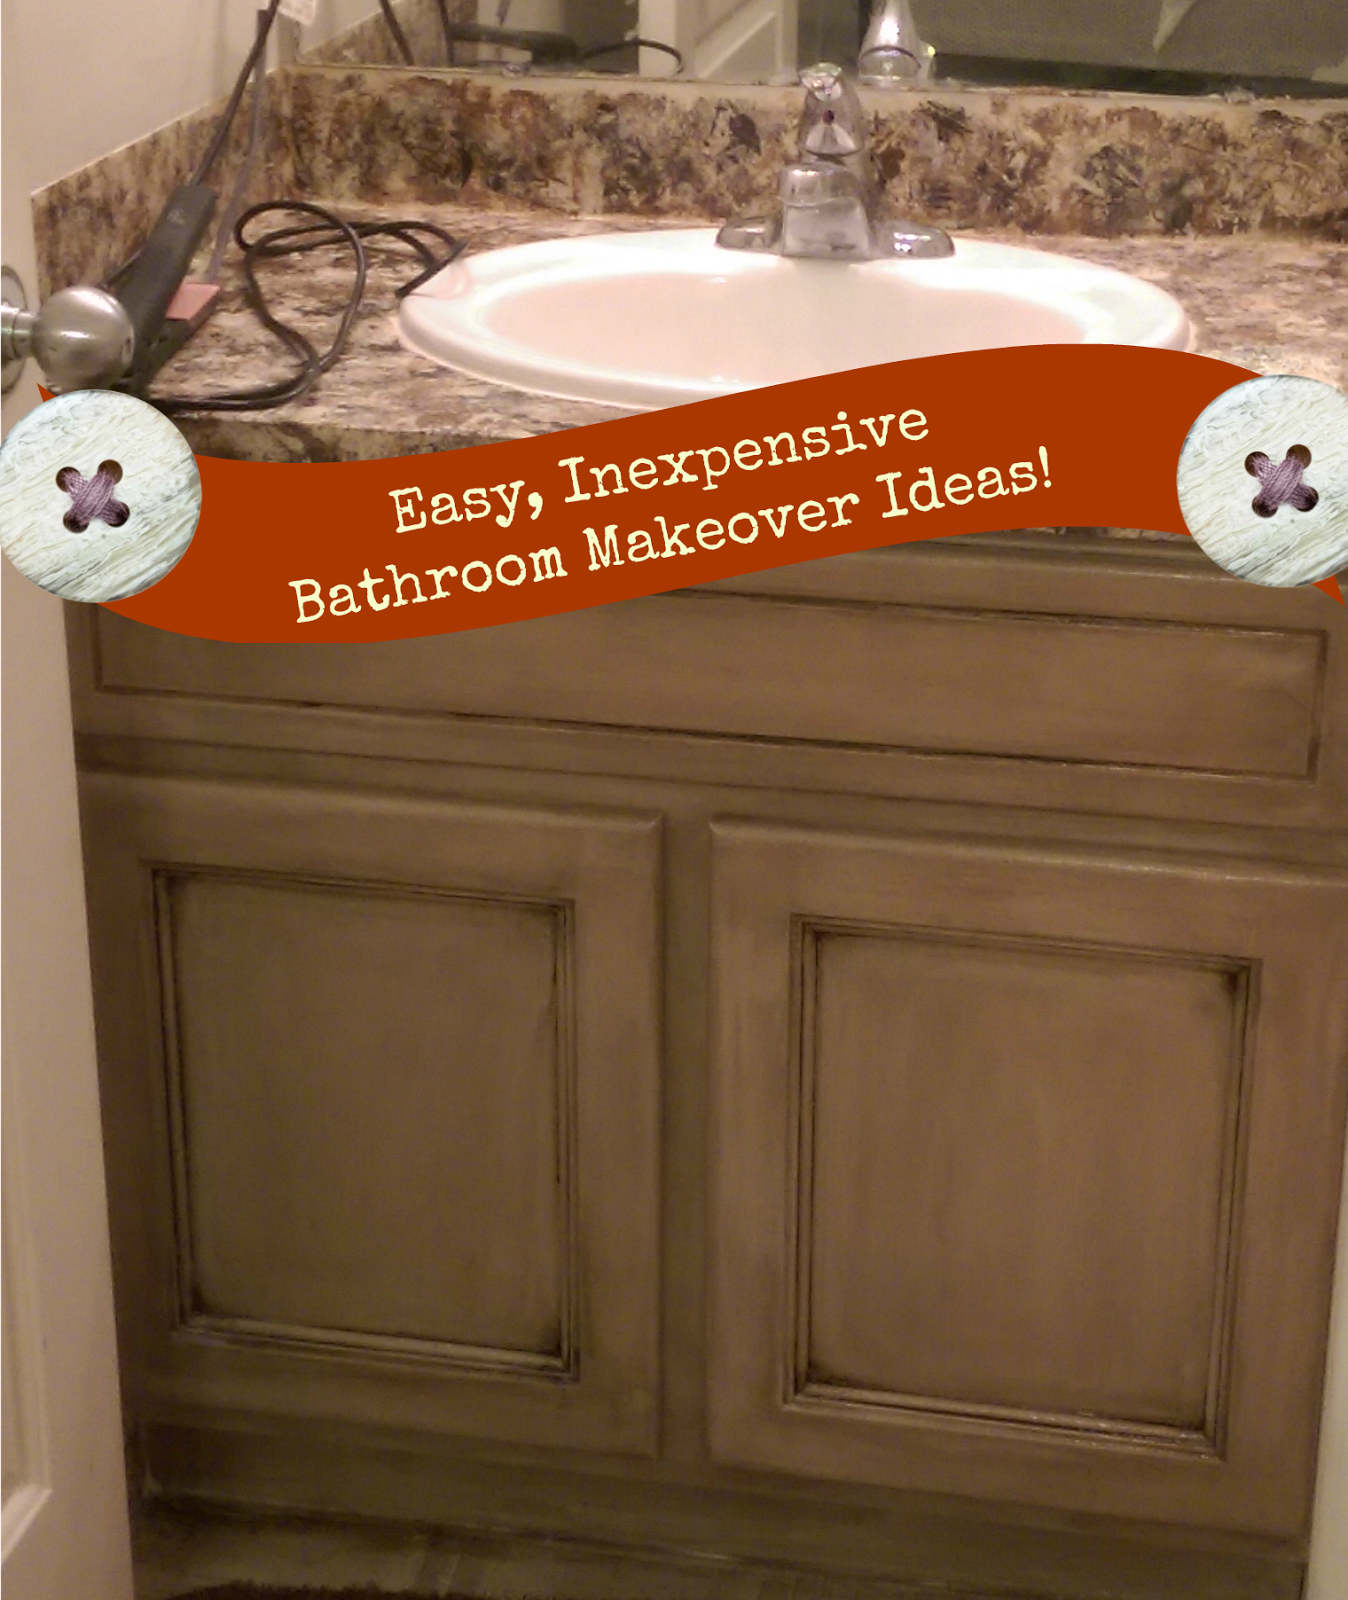
I decided to start with my bathroom cabinet. (I'll be doing my kitchen cabinets too later)

Supplies:
1- Magic Eraser and Old Shirt piece for a rag.
2- Diamond Brite Paint 40400 1 Quart Kitchen and Bath with Mildew Protection Semi Gloss Latex Paint White
3- Old Masters 80708 1 Pint Gel Stain, Dark Walnut
4- Rust-Oleum 2004 Zinsser Bulls Eye 1-2-3 White Water-Based Interior/Exterior Primer Sealer, 1-Quart
5- Minwax 64444 Semi Gloss Polycrylic Protective Finishes, 1 Quart
6- 2 Foam rollers and foam brush. (dollar store)
7- Painters tape for walls and floor.
Steps:
1- Clean your cabinets thoroughly with the magic eraser and let it dry.
2- Tape off cabinet from the wall and floor. ( I didn't tape the floor since I am re-
doing that also)
3- Primer your cabinets with the suggested latex primer using a foam roller. Let the primer dry all the way before painting.

4- After the primer is all the way dry, paint your first coat of white paint using second foam roller. Let dry and coat a second time.
5- IMPORTANT! Before you stain them you need to give them at least 4 hours of dry time after last coat of paint or it will ruin it.
6- After they are completely dry, use foam brush and start with gel stain on any decorative cracks and crannies. Then just lightly brush in spots over the entire surface you are working on. Use your old shirt to start wiping it off. Wipe off the gel stain to desired color. Try to keep some in the cracks and crannies for the darker antiqued look.
7- Let the gel stain dry for at least 6 hours. DO NOT try to wipe it after you have finished wiping. It will streak and doesn't cover a second time.
 8- Finish with 2 coats of the Polycrylic finish and your finished! You can use a different color under your stain for a different look. I just wanted white so it looked antique brown.
If you Loved this Idea PLEASE SHARE!

Comments
Post a Comment